> ## Documentation Index
> Fetch the complete documentation index at: https://cubed3-claude-gallant-ramanujan-v3umyw.mintlify.site/llms.txt
> Use this file to discover all available pages before exploring further.
# Create a project
> In this step, we will create a Cube Core project on your computer, connect a data source, and generate data models.
## Scaffold a project
Start by opening your terminal to create a new folder for the project, then
create a `docker-compose.yml` file within it:
```bash theme={null}
mkdir my-first-cube-project
cd my-first-cube-project
touch docker-compose.yml
```
Open the `docker-compose.yml` file and add the following content:
```yaml theme={null}
services:
cube:
image: cubejs/cube:latest
ports:
- 4000:4000
- 15432:15432
environment:
- CUBEJS_DEV_MODE=true
volumes:
- .:/cube/conf
```
Note that we're setting the [`CUBEJS_DEV_MODE`](/reference/configuration/environment-variables#cubejs_dev_mode) environment variable to `true` to
enable [development mode](/reference/configuration/environment-variables#cubejs_dev_mode). This is
handy for local development but not suitable for
[production](/cube-core/running-in-production).
**Development mode is an authentication bypass.** Cube is in development mode when
`CUBEJS_DEV_MODE=true`, and also whenever `NODE_ENV` is not `production`. When Cube
is started through the `cubejs` CLI — which is what the official Docker images run —
setting `CUBEJS_DEV_MODE=true` additionally forces `NODE_ENV=development`, which
switches off JWT verification on the
[REST (JSON)](/reference/core-data-apis/rest-api) and
[GraphQL](/reference/core-data-apis/graphql-api) APIs: they then accept requests with
no token at all.
Development mode also mounts [Playground](/docs/explore-analyze/playground) and its
supporting endpoints with no authentication whatsoever. Anyone who can reach the
instance is handed a ready-to-use API token, and can mint further ones carrying any
security context signed with your API secret — and so query every data API as any user,
bypassing [member-level access
control](/docs/data-modeling/access-control/member-level-security) and [row-level
security](/docs/data-modeling/access-control/row-level-security). The same endpoints
read your data model files and the table schema of every connected data source, and
overwrite your data model and your `.env`. With `CUBEJS_DEV_MODE=true` and no
[`CUBEJS_SQL_PASSWORD`](/reference/configuration/environment-variables#cubejs_sql_password)
set, the SQL API accepts any credentials as well, allowing arbitrary SQL against
connected data sources.
This is intentional. Development mode is designed to run on a developer's local
machine for ease of use and debugging. Never run it where anyone else can reach it,
never expose it to the internet, and never use it in production. Using development
mode in the Cube cloud platform is highly discouraged — it bypasses the platform's
security model.
To keep it off: `cubejs server` and the official Docker images already set
`NODE_ENV=production`, so leaving `CUBEJS_DEV_MODE` unset — its default — is enough
there. If you embed `@cubejs-backend/server-core` directly rather than starting Cube
through the `cubejs` CLI, set `NODE_ENV=production` yourself, since an unset `NODE_ENV`
puts the instance in development mode whatever the flag says.
If you're using Linux as the Docker host OS, you'll also need to add
`network_mode: 'host'` to your `docker-compose.yml`.
## Start the development server
From the newly-created project directory, run the following command to start
Cube:
```bash theme={null}
docker compose up -d
```
Using Windows? Remember to use [PowerShell][powershell-docs] or
[WSL2][wsl2-docs] to run the command below.
## Connect a data source
Head to [http://localhost:4000](http://localhost:4000) to open the [Developer
Playground][ref-devtools-playground].
The Playground has a database connection wizard that loads when Cube is first
started up and no `.env` file is found. After database credentials have been set
up, an `.env` file will automatically be created and populated with credentials.
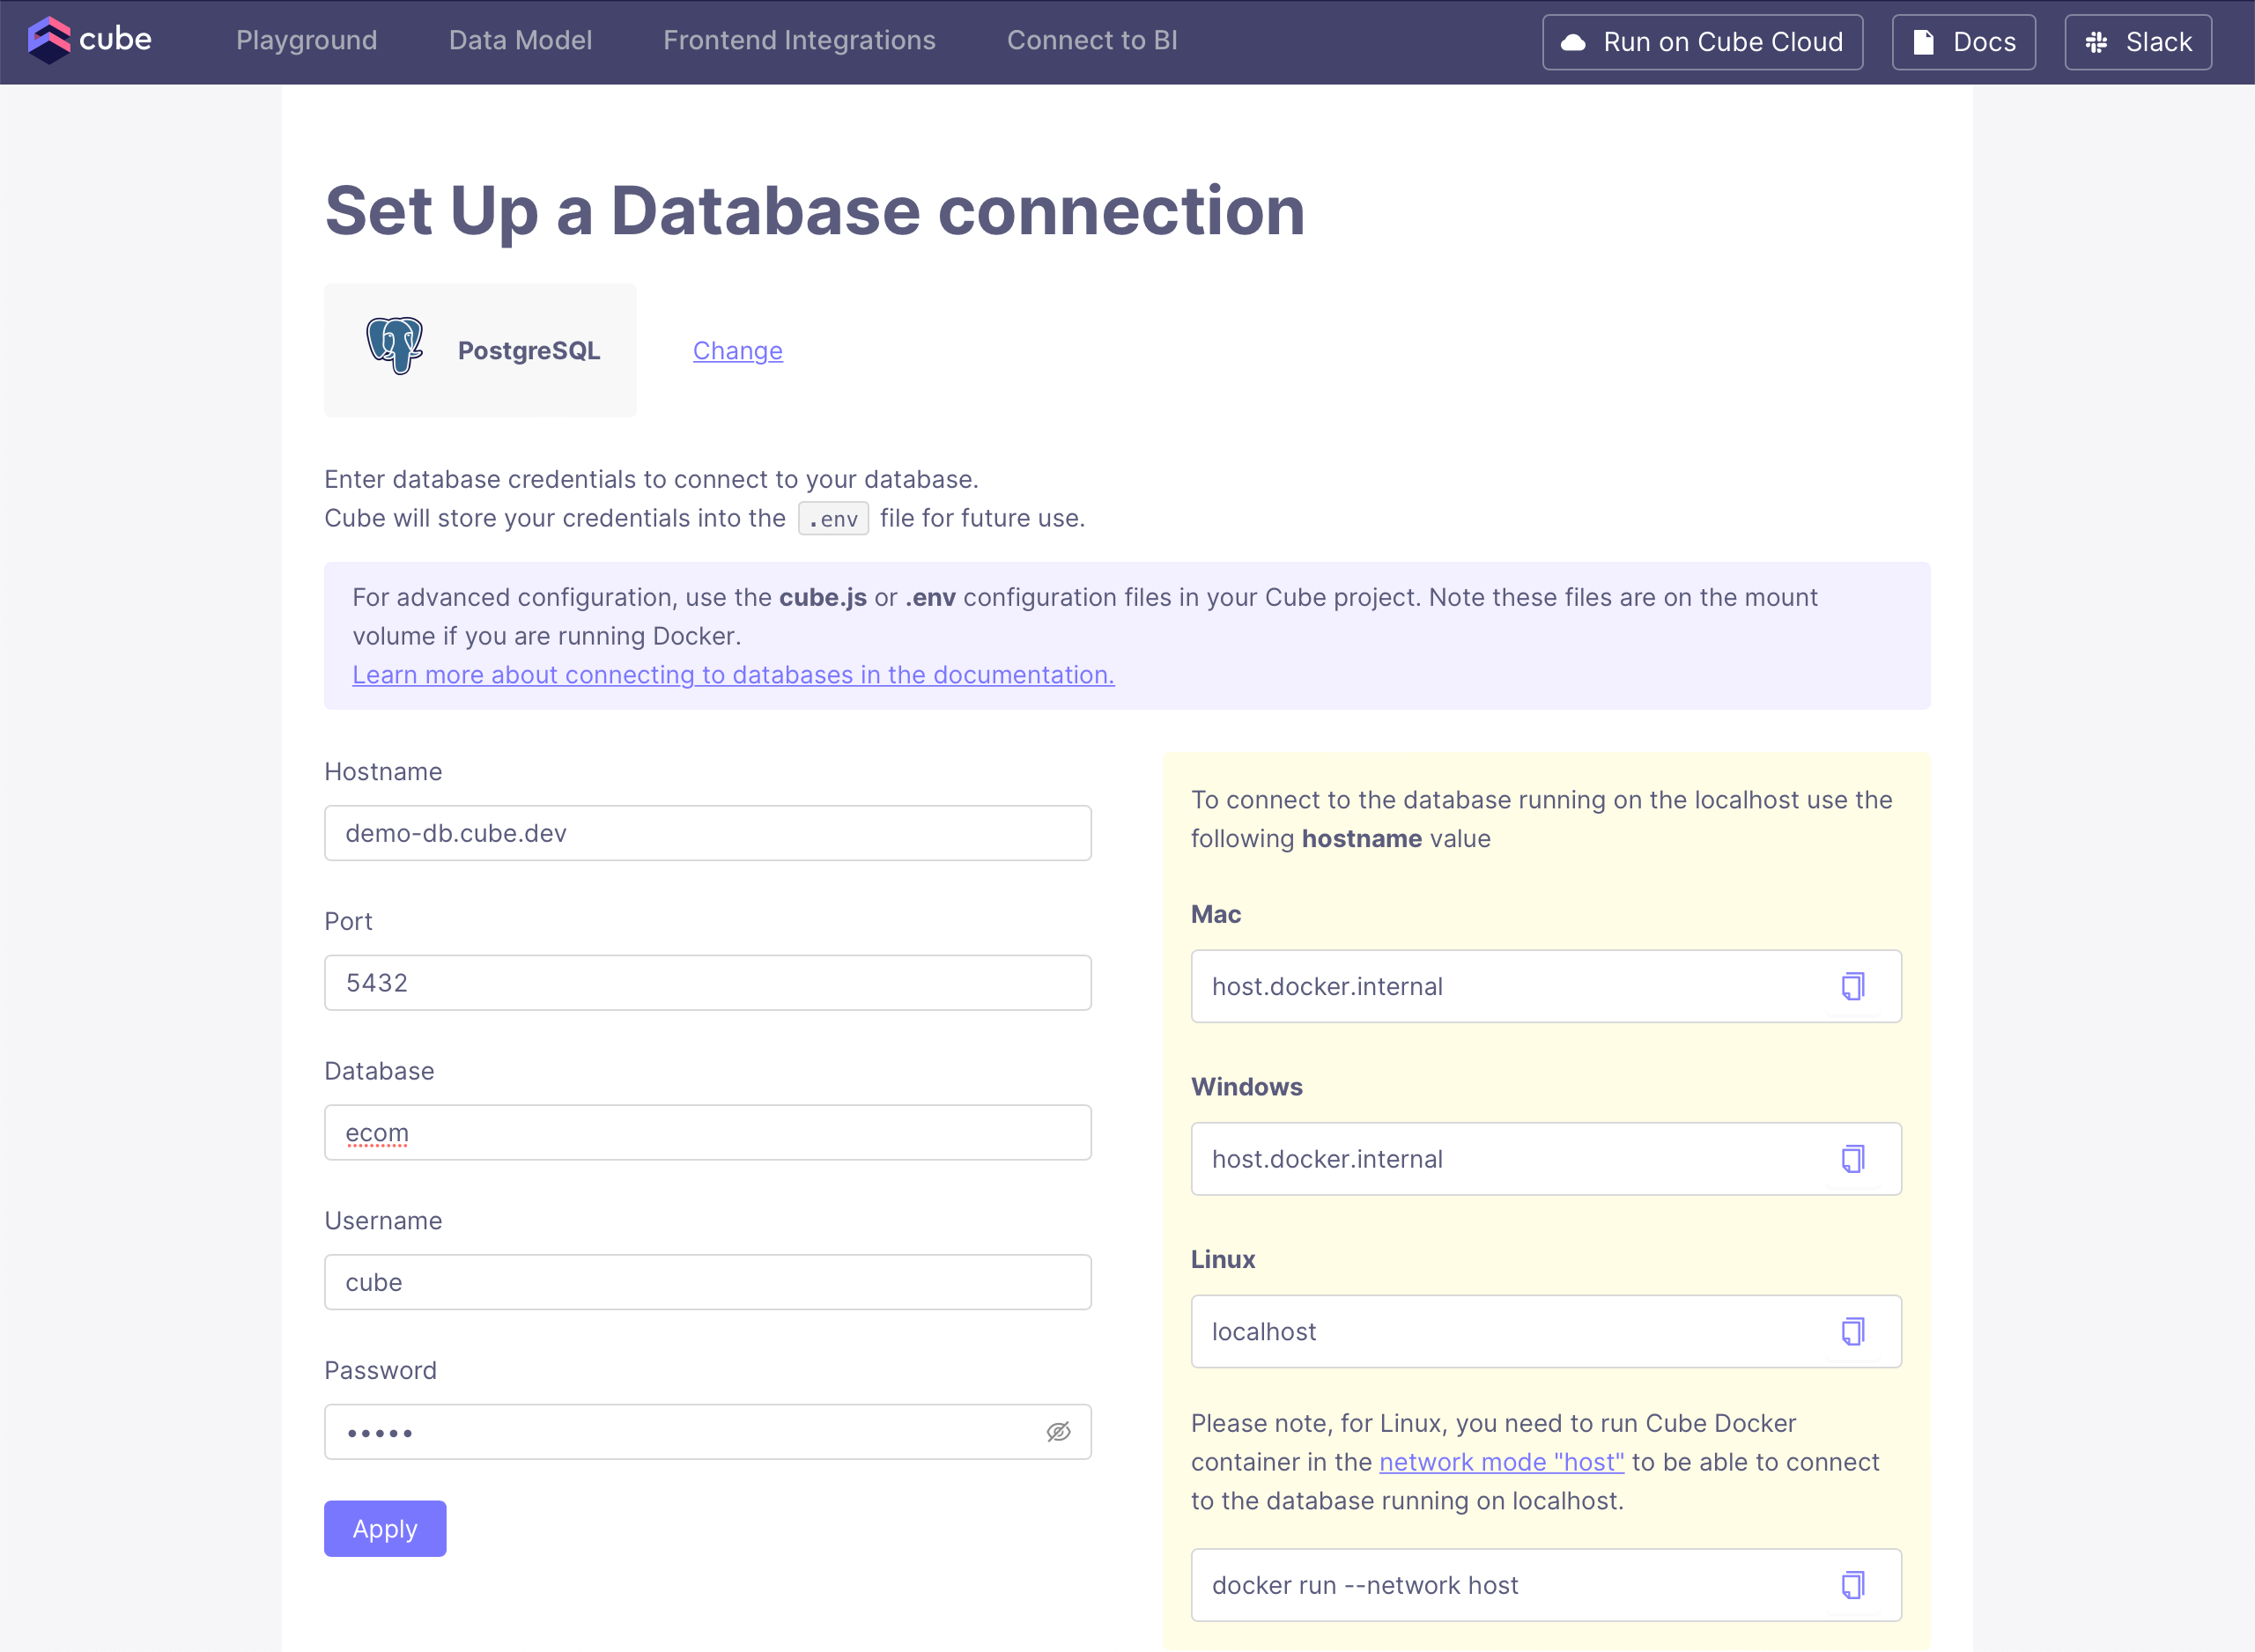
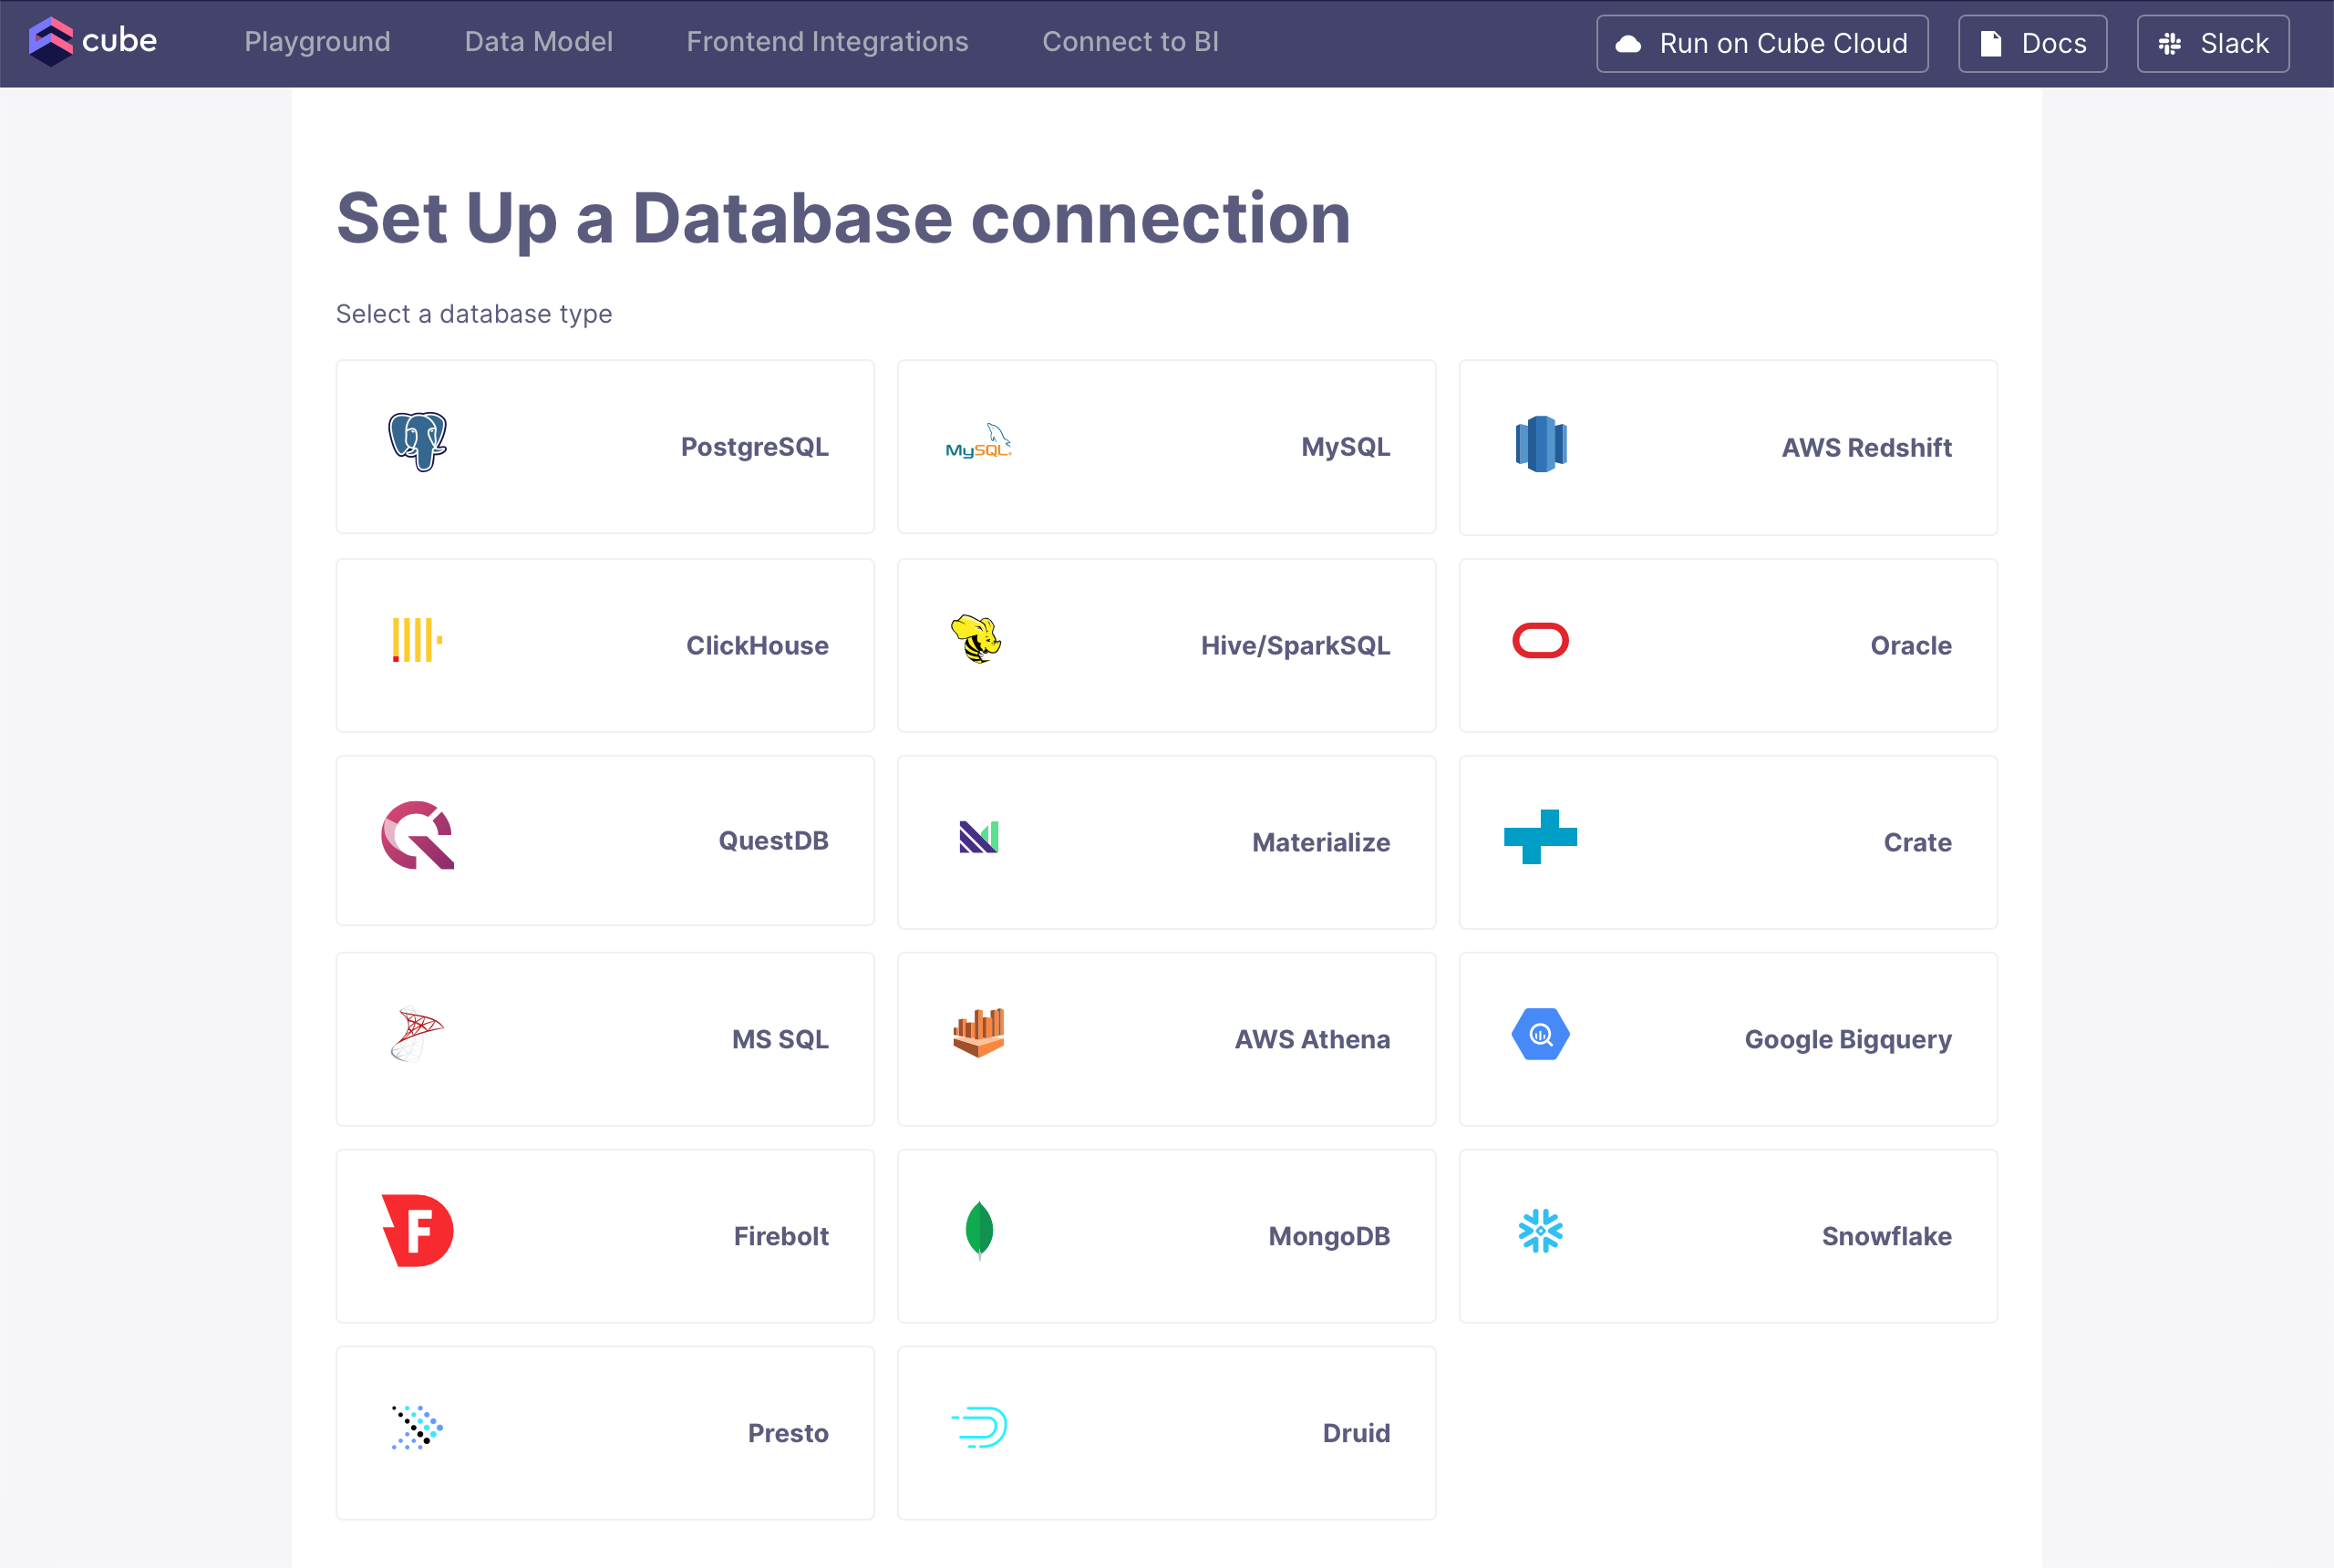 Want to use a sample database instead? Select **PostgreSQL** and use the
credentials below:
Want to use a sample database instead? Select **PostgreSQL** and use the
credentials below:
| Field | Value |
| -------- | ------------------ |
| Host | `demo-db.cube.dev` |
| Port | `5432` |
| Database | `ecom` |
| Username | `cube` |
| Password | `12345` |
After selecting the data source, enter valid credentials for it and
click **Apply**. Check the [Connecting to Databases][ref-conf-db] page
for more details on specific data sources.
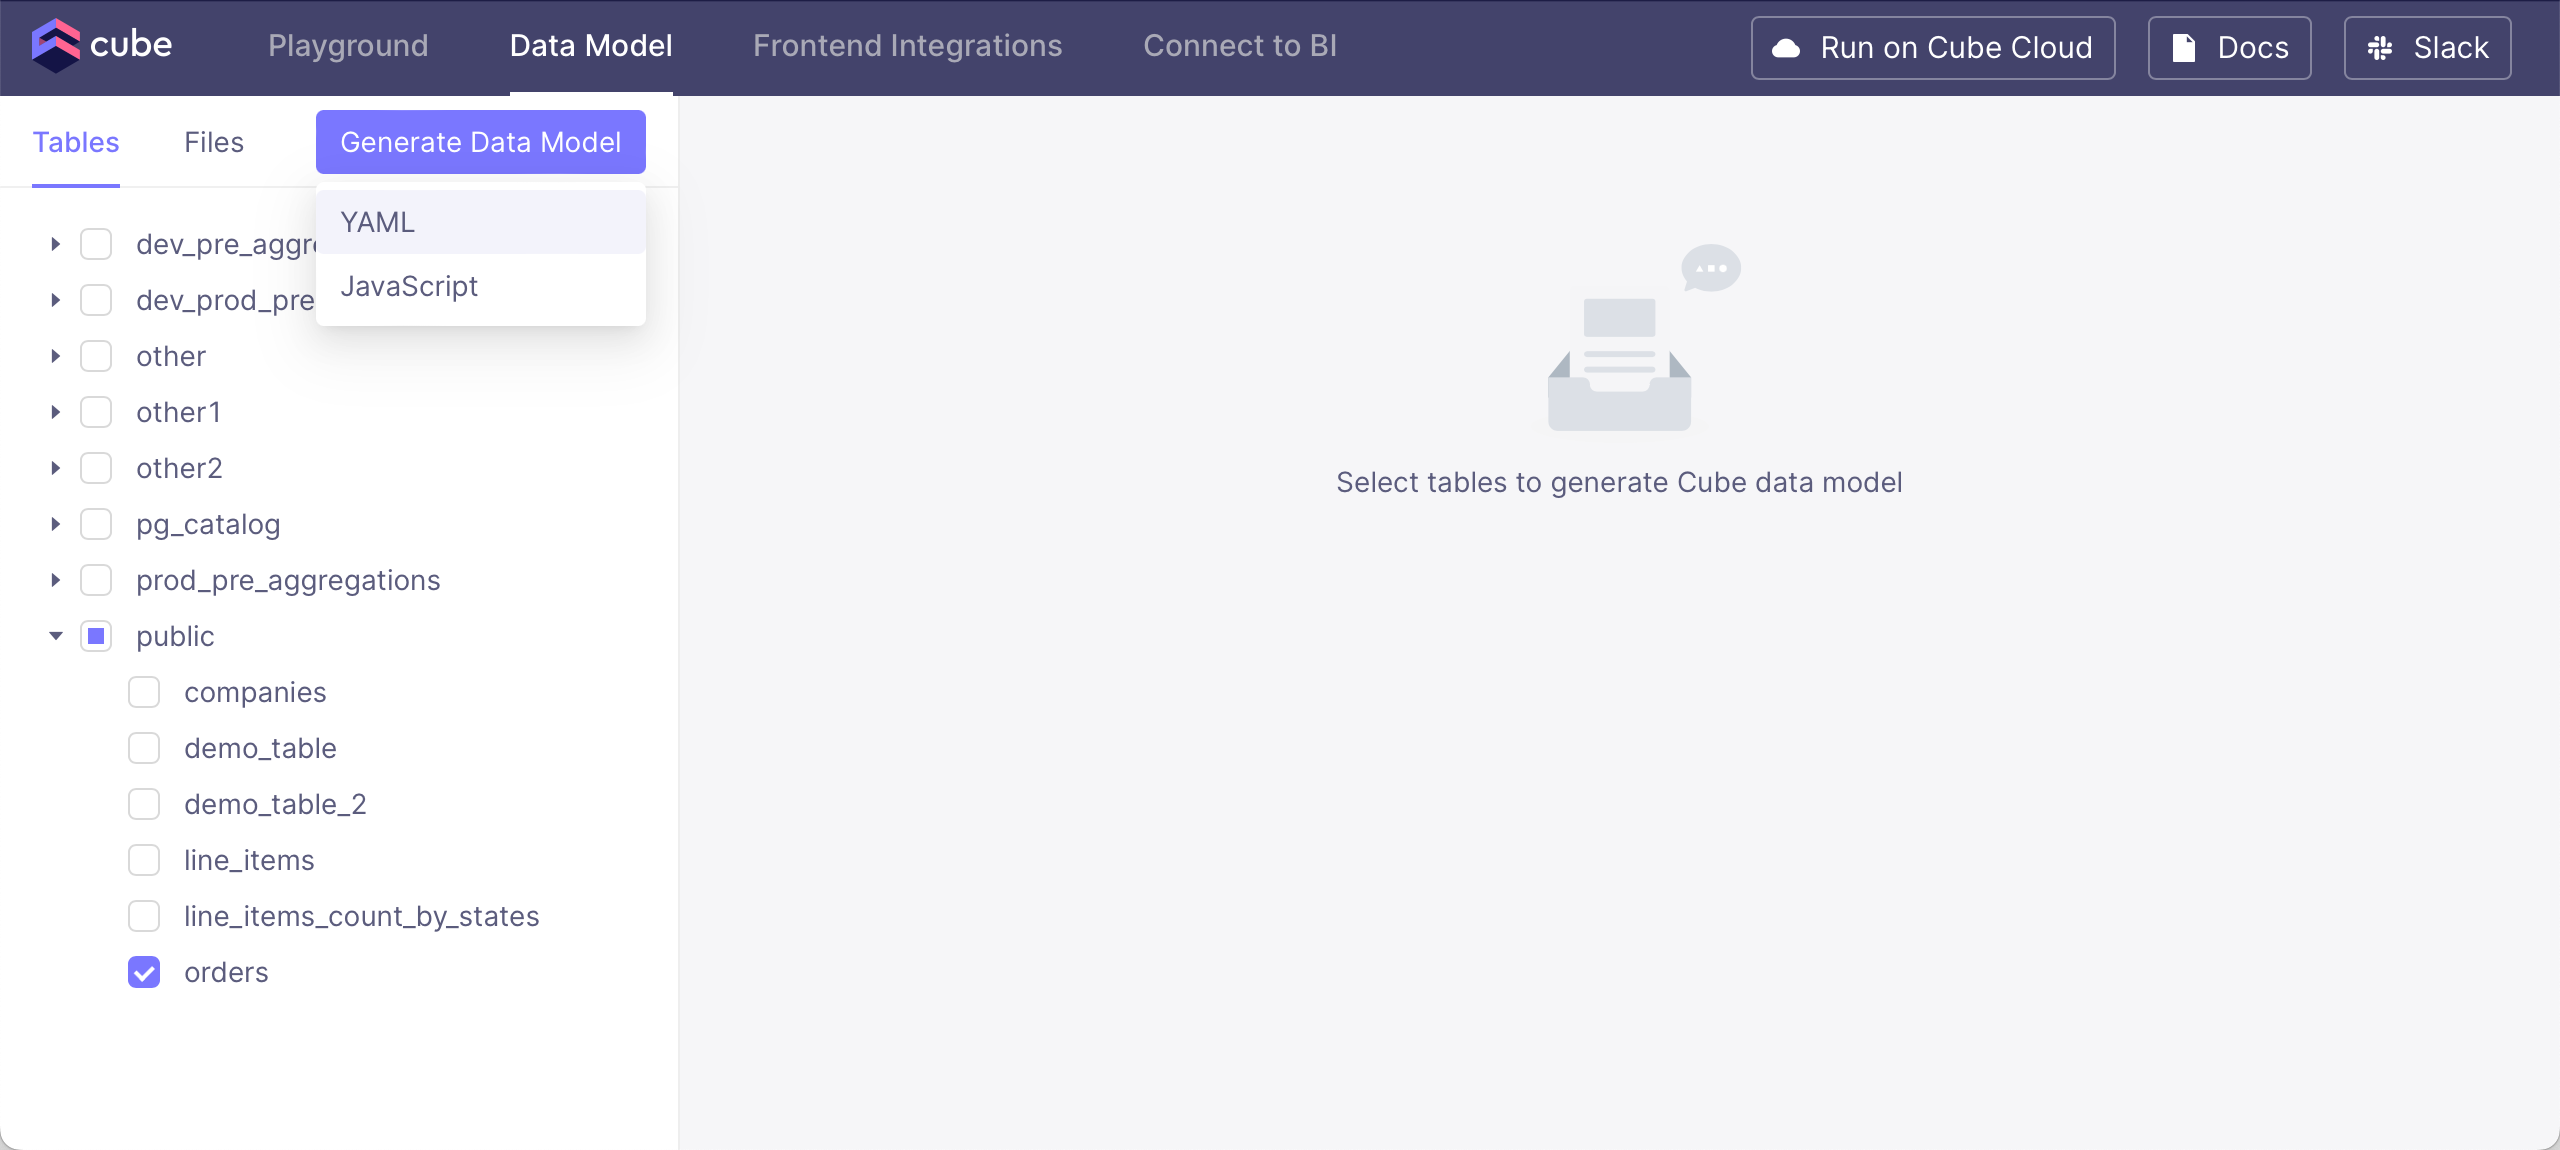
 You should see tables available to you from the configured database; select the
`orders` table. After selecting the table, click **Generate Data Model**
and pick either **YAML** (recommended) or **JavaScript** format:
You should see tables available to you from the configured database; select the
`orders` table. After selecting the table, click **Generate Data Model**
and pick either **YAML** (recommended) or **JavaScript** format:
 Finally, click **Build** in the dialog, which should take you to
the **Build** page.
You're now ready for the next step, [querying the
data][ref-getting-started-core-query-cube].
[powershell-docs]: https://learn.microsoft.com/en-us/powershell/
[ref-conf-db]: /admin/connect-to-data/data-sources
[ref-getting-started-core-query-cube]: /cube-core/getting-started/query-data
[ref-devtools-playground]: /docs/explore-analyze/playground
[wsl2-docs]: https://learn.microsoft.com/en-us/windows/wsl/install
Finally, click **Build** in the dialog, which should take you to
the **Build** page.
You're now ready for the next step, [querying the
data][ref-getting-started-core-query-cube].
[powershell-docs]: https://learn.microsoft.com/en-us/powershell/
[ref-conf-db]: /admin/connect-to-data/data-sources
[ref-getting-started-core-query-cube]: /cube-core/getting-started/query-data
[ref-devtools-playground]: /docs/explore-analyze/playground
[wsl2-docs]: https://learn.microsoft.com/en-us/windows/wsl/install